Regardless if it’s a car seat for a one-year-old, toddler, preschool, or even pre-teens, these things are made with only one purpose to fulfill. And that’s to keep your bundle of joy safe while inside a vehicle. When they’re installed and used correctly, they do an excellent job of fulfilling that purpose. However, it’s also a fact that these things can take a beating.
The car seat will suffer from spilled food, crumbs, sticky fingers, spit-ups, ‘pooplosions,’ and every other mess that you can and cannot think of. It’s inevitable. And while everyone can’t help but find pictures of babies in a mess cute, the reality is very much different.
The truth is, cleaning up a baby’s mess is serious business especially if you know how filthy car seats can be. If anything, cleaning the car seat is easy to do. The more challenging part is how to do it properly.
You can’t clean car seats just as you would other things. It has to be done correctly. Otherwise, it’s effectiveness in keeping your little one safe can be affected. You don’t want car seat cleaning to end up in a disaster.
But don’t fret. You don’t need rocket science to get the job done right. As long as you follow the following tips on how to clean a car seat, you’d be on the right track.
Prevention Is Key
It’s true that as parents, you can never prevent ‘yuck’ moments from happening. So should the inevitable happens, you have to be prepared. This is where a bib will come handy. Better yet, go for those full-coverage bibs like the ones from Bib-on.
Unlike the regular ones, these products act both as a bib and an apron. You still have to prepare yourself to clean up anything that will find its way through the car seat though. But at least, you’ll somehow be able to minimize the mess.
Bumkins’ SuperBib is also a must-try product. Theirs comes with a pouch at the bottom — perfect for catching spit-ups and vomits.
The Car seat Manual Is Your Best Friend
You already know that all car seats, no matter the type or manufacturer, have one job. But not all car seats are created equal especially when it comes to keeping them clean. How you clean one car seat will not necessarily work on another one since these things come in different shapes, sizes, materials, and features.
It can be tempting to jump straight ahead and clean your car seat using the tried and tested bleach + water combo. BUT DON’T. Doing so might even do your child’s precious car seat more harm than good (more on this on the next tip).
There is no universal way to clean car seats but to follow the instructions in the manual. They’ll tell you exactly how to do it, including the do’s and don’ts. After all, the manufacturer is the one who made the seat which means they’re the most reliable resource that you can find.
If you can’t find the instructions manual that came with the car seat, it’s usually available from the manufacturer’s website. If it’s not there or if there are things that you need to clarify, call the car seat manufacturer directly.
ONLY Use Gentle Soap For Cleaning
Remember this: when it comes to choosing which soap to use for cleaning the car seat, gentle and natural are two different things. The former should only be the one to use for cleaning. The latter, well, is not advisable. Here’s why.
If you’re someone who has sworn to live the ‘only organic’ life (which is a good thing), you know how miraculous vinegar and baking soda work as cleaning agents. Does that mean that you can also use them to clean car seats? The answer is NO.
You see, vinegar is an acid which is corrosive while baking soda is a base that’s caustic. These things can wreak havoc on the structural integrity of the car seat which can make it ineffective in restraining your child. Instead, use anything with a pH level near neutral (7.0) unless the manual recommends a specific cleaning agent to use.
Perfect Timing
Cleaning your child’s car seat is a time-consuming process. This is because you have to make sure that all the components are given the attention they need during this ordeal. It’s one thing to take the car seat apart, and the other one is putting the parts back together.
It will take hours to complete the task so keep this mind before cleaning the car seat. Ideally, you’d like to do it at night when your little one is already in bed, so you have enough time to get everything done including getting the car seat dried out. You can also do it on a weekend where you plan to stay at home.
Another thing to note is that most parts of the car seat need to be washed by hand. If the manual says this part can go into the washing machine, then go ahead. See to it that it says so in the instructions. Sun and fresh air can also help in getting the stinky smell away so keep that in mind.
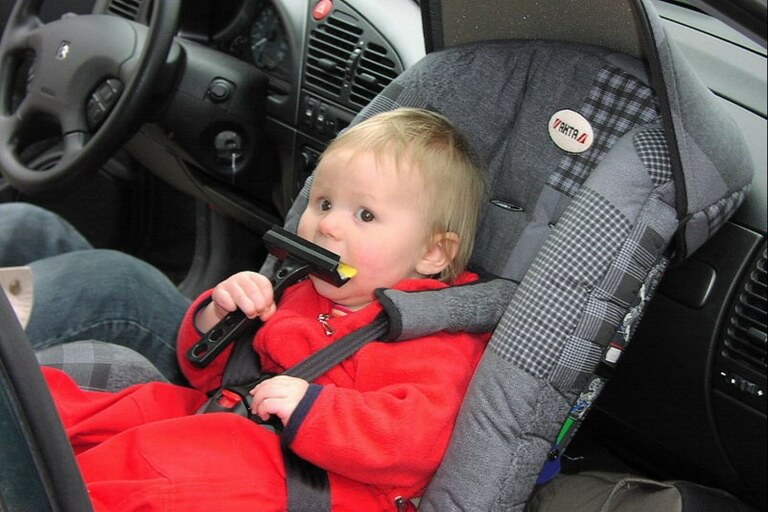
Pay Attention To The Straps And Buckles
Out of all the components a car seat has, the straps and buckles are the most important parts as far as cleaning is concerned. That’s because these parts are the ones responsible for keeping your little angel tightly and securely restrained to the seat.
Aside from only using gentle cleaners, NEVER EVER consider putting the straps inside a washing machine nor a dryer for that matter. Some manufacturers will allow you to submerge the straps in water while some will not — another reason why reading the manual is extremely crucial.
The straps on a car seat are made of webbing. In case of a crash, this material will stretch which reduces the amount of force transmitted to your child. Throwing these straps in the washing machine or dryer will prematurely pull all the ‘stretch’ out of the harness. This will put your precious one at risk of receiving serious injuries should there be a collision.
This is also one of the reasons why you should only use gentle cleaners. Harsh soaps can damage the fibers of the straps, weakening its restraining ability in the process. Water and mild soap are usually recommended by manufacturers to clean the straps and buckles.
Repeat the process as necessary for tough stains. You can consider getting a replacement from the manufacturer if water and mild soap can’t seem to do the job of getting rid of terrible smells. These things are inexpensive most of the time so don’t worry.
Vacuum Tough To Reach Areas
As you go along, you will face challenges. Crevices, for instance, are areas that can be difficult to clean especially if the manual says you can’t disassemble some of the connected parts. The first thing that you have to do is to gently overturn the seat to remove any crumbs that have accumulated.
Once done, vacuum out (use the long thin sucker) as much dirt, dust, and food as possible. A flathead screwdriver wrapped in a wet rag should do the trick for dealing with any hardened stuff that the vacuum can no longer remove.
Use paper towels to dry off the car seat. Be careful with getting the metal parts wet to prevent rusting. If they do get wet, see to it that you completely dry out the seat before your child uses it. Let it stay under the sun for a few hours provided that the weather is on your side.
Cleaning The Cover
The good news is that most car seats come with fabric covers that are not only removable but also machine-washable. If your child’s car seat is one of those, getting the cover cleaned should be easy.
Getting the cover off will make things a little tedious. Again, this is where the manual will come in handy. You can also check the manufacturer’s website if they have instructional videos that show how to remove the cover.
Using your phone, consider capturing a video of yourself removing the cover. This will help you a lot when it’s time to put it back on. Don’t rely on your ultra-sharp memory as it will fail you sometimes.
And although you can machine wash most car seat covers, don’t put them in the dryer. Similar to the harness, a dryer can ruin the fabric of the cover which can render it useless.